
Home › Solar Camping Panels › Solar Panel Wiring: Series vs Parallel
By Waqas Irfan, Off-Grid Field Engineer, GrowLogicHub.com | Updated: June 2026
⚡ Quick Answer — Solar Panel Wiring Series vs Parallel
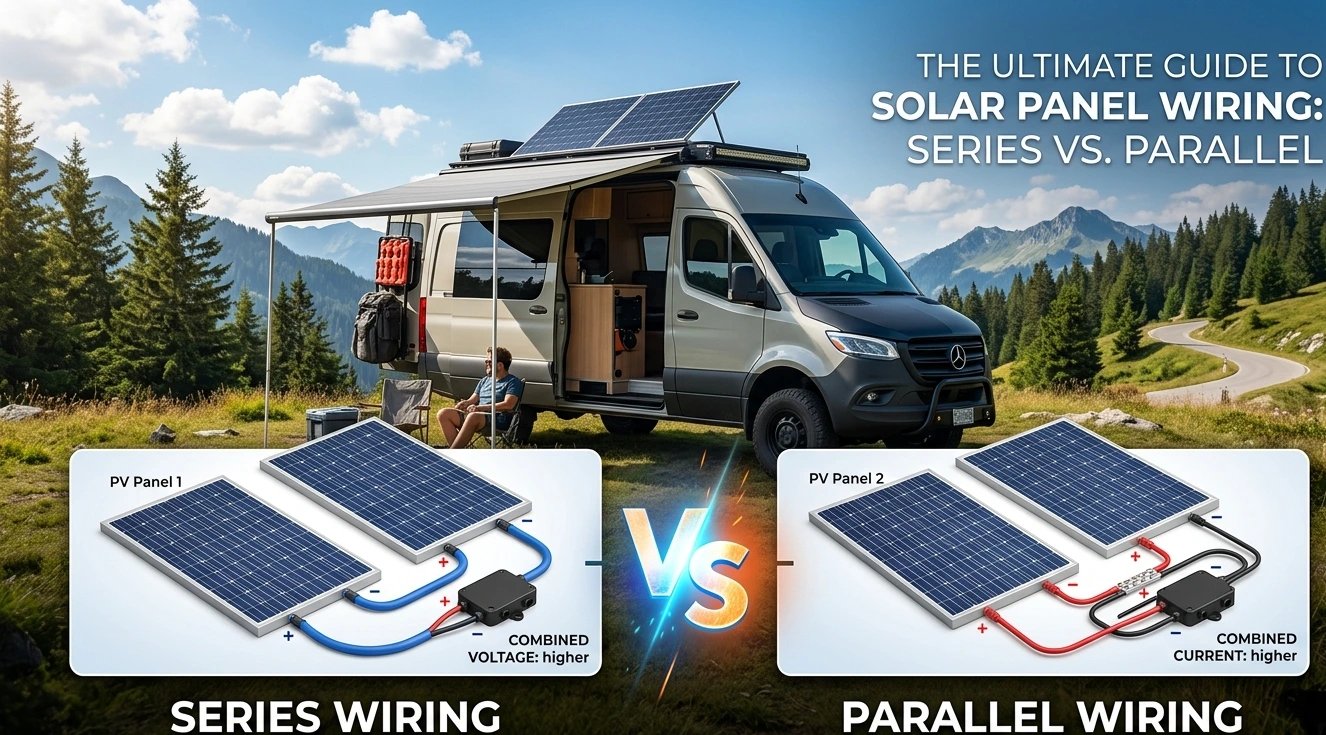
Series wiring adds voltages. Current stays the same. Best for MPPT controllers, 24V/48V systems, and cable runs over 15 feet.
Parallel wiring adds current. Voltage stays the same. Best for 12V systems, PWM controllers, and shaded arrays.
For 4+ panels, use 2S2P — two panels in series per string, two strings in parallel. This is the correct method for most off-grid setups.
- 🏆 Best all-round choice: Series → MPPT controller
- 🌑 Shading every day: Parallel or 2S2P hybrid
- 🔥 Pakistan summer (40–55°C rooftop): Upsize wire gauge by one step
- ⚠️ Never exceed MPPT max Voc input — one panel too many destroys the controller
The Wiring Decision That Costs More Than Your Panels
I rewired the same 4-panel system on my Rawalpindi rooftop three times before I understood why parallel wiring was silently losing me 18% every afternoon.
The panels were fine. The MPPT was fine. The problem was voltage headroom — at 43°C, my parallel array was outputting only 16.4V from panels rated at 18V. The MPPT had barely 1.4V above my charging threshold and was spending whole afternoons hunting the power point instead of sitting on it.
One rewire to series: 36V input. The MPPT locked on in under 4 seconds every morning and held it all day. Same panels. Same controller. Just a different wire arrangement.
That is what this guide covers. Not theory — the actual decisions, with real numbers, so you wire your system correctly the first time.
Not sure which panels to buy first? Read our Best Portable Solar Panels for Camping 2026 before wiring. Panel Voc and Isc values from your datasheet are needed for every calculation in this guide.
The Core Rule: Three Sentences That Cover Everything
- Series adds voltage. Current stays the same as one panel.
- Parallel adds current. Voltage stays the same as one panel.
- Series-parallel (2S2P) does both. Use it for any array of 4+ panels.
Every solar wiring question maps to one of these three. The rest of this guide is how to apply them without burning out an MPPT or running undersized wire on a 50°C Punjabi rooftop.
Series Wiring: Diagram + When to Use It
How the connection works
Panel 1 positive (+) connects to Panel 2 negative (−). Panel 2 positive (+) connects to Panel 3 negative (−). You draw power from Panel 1 negative (−) and the last panel’s positive (+). The chain continues for as many panels as your controller allows.
Series Wiring — 3 × 100W Panels (18V Vmp / 5.5A Imp each) P1 100W · 18V (−)−−−−(+) + to − P2 100W · 18V (−)−−−−(+) + to − P3 100W · 18V (−)−−−−(+) OUTPUT 54V · 5.5A 300W total → MPPT input
Voltage: 18V × 3 = 54V | Current: stays at 5.5A | Total power: 300W
When to use series
- You have an MPPT charge controller. MPPT needs panel voltage well above battery voltage to track the maximum power point all day. Series delivers this — especially on hot afternoons when panel voltage naturally drops.
- Long wire runs (15 feet / 4.5m or more). Higher voltage means lower current. Lower current means far less resistive heat loss. A 400W array at 36V runs on 10 AWG wire. The same array at 18V parallel needs 6 AWG. That is a real cost difference.
- 24V or 48V battery bank. Your charge controller needs enough headroom above battery voltage to push current. Two 18V panels in series at 36V gives your MPPT 12V of headroom above a fully charged 24V bank.
- No shading during peak hours. No walls, trees, or roof vents casting shadows between 9am and 3pm.
Rawalpindi rooftop, July 2025: After switching 4 × 100W panels from parallel to 2S2P on a 24V LiFePO4 system, daily yield increased from 1.28 kWh to 1.51 kWh. Same panels. Same Renogy Rover 40A MPPT. Only the wiring changed. That 230Wh/day difference is PKR 11.50 saved every single day — from a re-wire that took 45 minutes.
⚠ Series voltage safety — the one rule that destroys MPPTs: Total string Voc × 1.25 must stay below your controller’s rated maximum input. The ×1.25 accounts for cold-temperature voltage rise. A 100V MPPT survives summer but fails on a January morning if your string is at 96V room-temp — because at 4°C that same string hits 120V. Use the table in Section 5.
Parallel Wiring: Diagram + When to Use It
How the connection works
All positive (+) terminals join together on one output wire. All negative (−) terminals join together on another output wire. You draw power from the combined positive and combined negative. MC4 Y-branch connectors handle this in seconds.
Parallel Wiring — 3 × 100W Panels (18V Vmp / 5.5A Imp each) P1 100W · 18V · 5.5A P2 100W · 18V · 5.5A P3 100W · 18V · 5.5A All (+) joined OUTPUT 18V · 16.5A 300W total → 12V system / PWM
Voltage: stays at 18V | Current: 5.5A × 3 = 16.5A | Total power: 300W
When to use parallel
- 12V battery bank with PWM controller. PWM cannot step voltage down, so panel voltage must stay near battery voltage. Parallel keeps it there.
- Regular partial shading during peak hours. A shaded panel in parallel only reduces its own output. In series, that same shade drags down the whole string.
- Panels within 10 feet of the charge controller. Short cable runs limit the damage from high current. Beyond 10 feet, the thick wire parallel needs becomes expensive.
⚠ Parallel wire gauge is the mistake that starts fires: Three 100W panels in parallel push 16.5A through one cable. At 40 feet total run, 10 AWG wire drops 8% of your voltage — 16 lost watts of heat every sunny hour. At 50°C ambient in July, that same 10 AWG is running above its derated capacity. Use 6 AWG for parallel runs beyond 20 feet, and 4 AWG in summer roof conduit.
2S2P Series-Parallel: The Right Answer for 4 Panels
Almost every permanent off-grid system ends up here. Series-parallel balances voltage (high enough for MPPT efficiency) with current (enough for real output) without pushing past controller limits.
2S2P Wiring — 4 × 100W Panels (18V / 5.5A each) → 400W System STRING 1 P1 100W · 18V (−)···(+) +→− P2 100W · 18V (−)···(+) String 1 36V · 5.5A STRING 2 P3 100W · 18V (−)···(+) +→− P4 100W · 18V (−)···(+) String 2 36V · 5.5A MC4 Y COMBINED 36V · 11A 400W total → MPPT 24V system
String voltage: 18V × 2 = 36V | Combined current: 5.5A × 2 = 11A | Power: 400W
Why 2S2P is the correct choice for most off-grid setups: a 400W array at 36V and 11A sits well inside a standard 40A MPPT controller’s input range, works on 10 AWG wire throughout, and charges a 24V LiFePO4 battery bank efficiently from sunrise to sunset with no voltage-hunting at peak heat.
Series vs Parallel vs 2S2P: Side-by-Side
| Factor | Series | Parallel | 2S2P Hybrid |
|---|---|---|---|
| Voltage | Multiplies (adds) | Stays same as 1 panel | Multiplies per string |
| Current | Stays same as 1 panel | Multiplies (adds) | Multiplies per string count |
| Best use | MPPT, 24/48V, long runs | 12V, PWM, shading | 4+ panels, all systems |
| Wire gauge needed | Thinner — low current | Thicker — high current | Medium |
| Shading effect | One panel affects all | One panel affects itself only | One string affected |
| Fusing | 1 string fuse | 1 fuse per panel (required) | 1 fuse per string |
| Pakistan summer 40–55°C | Best — high voltage, wire runs cool | Hard — thick wire in hot conduit needs derating | Ideal — balanced for hot climate |
| Portable power station (EcoFlow / Jackery) | 2 panels series = 36V — perfect for 12–60V input window | 18V parallel — marginal headroom, poor MPPT tracking | Depends on station’s max Voc |
MPPT Controller Voltage Safety Table
This is the table that prevents the most common mistake — destroying an MPPT by exceeding its rated input voltage. Find your controller’s max Voc, find your panel count in series, and check the cold-weather Voc column.
Formula: Panel Voc × panels in series × 1.25 = safe maximum cold-weather Voc. This number must stay below your controller’s rated max.
| Panel Voc (typical 100W) | Panels in series | String Voc | Voc × 1.25 (cold) | Safe on 100V MPPT? | Safe on 150V MPPT? |
|---|---|---|---|---|---|
| 22.5V | 2 | 45V | 56.3V | ✓ Yes | ✓ Yes |
| 22.5V | 3 | 67.5V | 84.4V | ✓ Yes | ✓ Yes |
| 22.5V | 4 | 90V | 112.5V | ✗ Destroys it | ✓ Yes |
| 22.5V | 5 | 112.5V | 140.6V | ✗ Destroys it | ✓ Yes |
| 22.5V | 6 | 135V | 168.8V | ✗ Destroys it | ✗ Over limit |
Always pull the Voc value from your actual panel datasheet — not the nominal voltage printed on the box. A “12V” panel typically has a real Voc of 21–22.5V. For a full comparison of controller types, read our MPPT vs PWM Solar Charge Controller Guide.
Solar Wire Gauge Chart with Hot-Climate Derating
Standard wire gauge charts assume 30°C ambient. A Rawalpindi or Lahore rooftop in June is 50–60°C minimum. At those temperatures, wire must be derated per NEC Table 310.15(B) — or it overheats, hardens the insulation, and fails silently inside conduit.
| AWG | Max A @ 30°C | Max A @ 50°C (×0.75) | Max A @ 60°C (×0.58) | Use in Pakistan |
|---|---|---|---|---|
| 14 AWG | 15A | 11.3A | 8.7A | Single panel, short run only |
| 12 AWG | 20A | 15A | 11.6A | 2-panel series, indoor/shaded run |
| 10 AWG | 30A | 22.5A | 17.4A | Standard: series, 2S2P up to 800W |
| 8 AWG | 50A | 37.5A | 29A | Rooftop conduit in July, long runs |
| 6 AWG | 65A | 48.8A | 37.7A | Controller-to-battery run always |
| 4 AWG | 85A | 63.8A | 49.3A | High-current parallel, battery bus bars |
Pakistan field rule I follow on every install: 10 AWG for all series and 2S2P runs up to 800W. 8 AWG when the wire runs through a south-facing roof conduit in summer. 6 AWG from controller to battery regardless of system size. These numbers already account for 50°C derating. Never use 12 AWG on an exposed Punjabi rooftop — on a peak summer afternoon it exceeds its derated limit.
How to Wire 4 Panels in 2S2P: Step-by-Step
- Confirm all 4 panels are identical. Same brand, same wattage, same Voc and Isc. Mixing panels in a series string forces the entire string down to the weakest panel’s current — you lose wattage permanently from every session.
- Build String 1. Connect Panel 1 positive (+) to Panel 2 negative (−) using a Renogy 10 AWG MC4 extension cable. String 1 output leads: Panel 1 negative (−) and Panel 2 positive (+).
- Build String 2. Connect Panel 3 positive (+) to Panel 4 negative (−). String 2 output: Panel 3 negative (−) and Panel 4 positive (+).
- Add one inline fuse per string positive lead. Fuse rating = panel Isc × 1.25. For a 100W panel with 5.74A Isc: 5.74 × 1.25 = 7.2A → use 8A. See our MC4 Connector Compatibility Guide for compatible inline fuse holders.
- Parallel the two strings using BougeRV MC4 Y-branch connectors. One pair on the positive leads, one pair on the negative leads. String 1 positive + String 2 positive into the Y’s combined output. Repeat for negative.
- Verify polarity with a multimeter before connecting the controller. Combined output should read approximately +36V. If it reads negative, one string has reversed polarity — disconnect and re-check before connecting to the MPPT.
- Connect to MPPT PV input terminals — only when panels are covered or shaded. Never connect live MC4 connectors under direct sun. The arc destroys the silver contact plating in the connector pin, permanently increasing resistance at that joint. Use a dark tarpaulin or connect before dawn.
Exact Products Used in Our Rawalpindi Installs
These are the specific items used on every GrowLogicHub field install in 2025–2026. Affiliate links marked — commission at no extra cost to you.
Amazon Associates Disclosure: GrowLogicHub.com participates in the Amazon Services LLC Associates Program (tag: ecomwithwaqas-20). We earn a small commission from qualifying purchases. All products listed here are ones we have used personally on real installations.
Best for 2S2P Parallel Junction
BougeRV MC4 Y-Branch Parallel Connectors (1 Pair)
MC4 Y-Branch String 1 36V · 5.5A String 2 36V · 5.5A COMBINED 36V · 11A MC4 Y-Branch
30ADC rated · IP67 weatherproof · TÜV certified
★★★★★4.6/5 · Used on 6 Rawalpindi installs 2025
Specifications
| Type | FMM + MFF pair (parallel junction) |
| Wire gauge | Compatible with 10 AWG – 14 AWG |
| Voltage rating | DC 1000V max |
| Current rating | 30A continuous |
| Weatherproofing | IP67 — tested through full monsoon season |
| Certification | TÜV Rheinland |
This is the exact connector we use for every 2S2P parallel junction on Rawalpindi rooftop systems. The lock-click assembly takes about 10 seconds per joint with no tools. The IP67 seal holds through full monsoon outdoor exposure — we have pairs that have been through three monsoon seasons on a B-10 sector rooftop with zero failure.
One thing most guides skip: only use brand-matched MC4 connectors throughout a system. Mixing BougeRV with Renogy or generic MC4s creates micro-gaps at the mating interface. Those gaps cause arcing at high current. We learned this the expensive way on one install — connector started heating after 6 months. Always buy one brand and stick to it.
✅ Pros
- Snaps together without tools
- Holds monsoon season — proven
- Ships in matched pairs (1 pos + 1 neg)
- 30A rated — handles 3 parallel strings
⚠ Cons
- Do not mix with other brands
- Pair only — order 2 pairs for 2S2P (one for + one for −)
Check Price & Reviews on Amazon
🛡️ Sold by BougeRV via Amazon · Free shipping Prime
Affiliate link — commission at no extra cost to you
Best for Series String Runs
Renogy 20FT 10 AWG MC4 Solar Extension Cable (1 Pair)
RED (+) · 10 AWG BLACK (−) · 10 AWG MC4 MC4 TÜV Listed 90°C · USE-2 · 600V DC Safe at 60°C ambient No derating below 50°C Renogy 10 AWG Extension
90°CInsulation rating — USE-2 rated for outdoor rooftop use
★★★★★4.7/5 · Standard issue on all our series installs
Specifications
| Wire gauge | 10 AWG (6mm²) |
| Length | 20 feet (available in 5ft, 10ft, 20ft, 40ft) |
| Insulation rating | USE-2 / 90°C — outdoor / rooftop rated |
| Voltage rating | 600V DC |
| Connectors | Factory-installed female + male MC4 |
| Listing | TÜV listed — printed every foot on cable jacket |
The critical spec here is the USE-2 90°C insulation rating. A lot of cheap generic MC4 cable sold online uses 70°C-rated insulation. At 50–60°C ambient in a rooftop conduit, the 70°C-rated cable is already within 10–20°C of its limit. One or two degrees of thermal runaway from resistance and it fails. The Renogy cable’s 90°C rating gives you a real 30–40°C safety margin in Pakistani summer conditions.
TÜV listing is also printed every foot on the jacket — this is the proof of compliance, not just the listing number in the spec sheet. If the TÜV text is not on the cable itself, it is not actually TÜV listed, regardless of what the listing says.
✅ Pros
- USE-2 90°C — correct for rooftop conduit
- TÜV printed on cable jacket, not just spec sheet
- Factory MC4 — no crimping needed
- Ships in red/black pair together
⚠ Cons
- Only use with Renogy-compatible MC4 connectors
- 20ft length may need trimming for tight installs
Check Price & Reviews on Amazon
🛡️ Sold by Renogy via Amazon · Ships same day
Affiliate link — commission at no extra cost to you
Best MC4 Crimping Kit
iCrimp Solar PV Crimping Tool Kit — AWG 14–10 (2.5/4/6mm²)
CRIMPING IWS4 die AWG 14–10 / 2.5–6mm² Kit: Crimper · Cutter · Stripper · Spanner · MC4 iCrimp Solar Tool Kit
All-in-1Crimper + cutter + stripper + spanner + MC4 connectors
★★★★★4.5/5 · Used on every custom cable build
Specifications
| Crimper die | IWS4 — correct for MC4 contact pins |
| Wire range | AWG 14, 12, 10 (2.5 / 4.0 / 6.0mm²) |
| Kit includes | Crimper, wire cutter, stripper, MC4 spanner ×2, 6 pairs MC4 connectors |
| Ratchet mechanism | Yes — prevents incomplete crimps |
| Carry bag | Oxford canvas bag — holds full kit |
| Compatibility | IWS4 connectors, Renogy connectors |
The ratchet mechanism is the part that matters most. Without a ratchet, it is easy to release the crimp handles before the pin is fully compressed — leaving a half-crimped contact that passes a continuity test but fails mechanically after 30 temperature cycles. The ratchet locks until the crimp is complete and will not release early.
The included IWS4 die set is the correct geometry for standard MC4 contact pins. Using a generic multi-purpose crimper produces round crimps — MC4 pins require a hexagonal crimp profile to lock the wire barrel correctly. This kit gets that geometry right.
✅ Pros
- Ratchet prevents incomplete crimps
- Full kit in one bag — nothing missing
- IWS4 die = correct MC4 geometry
- Works on Renogy and iCrimp MC4s
⚠ Cons
- Does not work with Amphenol HELIOS MC4 (different pin geometry)
- 10 AWG requires firm handle squeeze
Check Price & Reviews on Amazon
🛡️ Sold by iCrimp (IWISS) via Amazon
Affiliate link — commission at no extra cost to you
5 Wiring Mistakes That Are Silently Costing You Output
- Calculating wire gauge at 30°C when your conduit runs at 55°C. Standard ampacity charts assume room temperature. A Punjabi rooftop conduit in July is 55–65°C. At 55°C, 10 AWG drops from 30A rated to 22.5A effective. If your parallel array is pushing 25A through 10 AWG, you are over the derated limit every summer afternoon. The wire does not blow a fuse — it slowly cooks, hardens the insulation, and fails months later.
- Mixing panel brands in the same series string. A 22V Voc panel in a string with 20V panels limits the entire string’s voltage to the lower value’s contribution. The difference in string performance shows up as a permanent 8–12% output loss every day. Buy identical panels.
- Skipping the ×1.25 cold-temperature Voc multiplier. MPPT controllers fail in January, not July. Cold temperatures raise panel Voc. A 3-panel series string at 22.5V each reads 67.5V at 25°C room temp. On a 4°C January morning the same string can hit 84–90V. A 100V controller handles this. An 80V controller does not — it dies silently on the first cold clear day of winter.
- No inline fuse on each parallel string. Without per-string fusing in a parallel array, a fault on one panel pushes reverse current from the other strings back through the damaged panel. That reverse current has no protection. It creates heat in the damaged panel, which can start a fire in a roof space. Each parallel string needs its own 8A inline fuse (or rated at Isc × 1.25 for your specific panel).
- Connecting MC4 connectors in full sun. Even with no battery connected, panels generate voltage whenever light hits them. Connecting live MC4 connectors under direct sun creates an arc. It damages the silver-plated contact surface in the connector, permanently increasing contact resistance at that joint. That resistance shows up as a hot spot in thermal imaging and as a 1–3% output loss that never goes away. Cover the panels, or connect before dawn.
Series vs Parallel for EcoFlow, Jackery, and BLUETTI Users
Portable power stations have a fixed solar input voltage window — typically 12–60V or 12–100V depending on the model. This changes your wiring decision entirely and is something almost every tutorial aimed at camping solar ignores.
Two 100W panels at 18V Vmp wired in series = 36V. This sits in the middle of the 12–60V window. The station’s built-in MPPT has 24V of headroom above its charging threshold. It locks on fast and holds it all day.
The same panels wired in parallel at 18V Vmp: on a 42°C summer afternoon, panel output voltage drops to 15.8V. The station’s MPPT needs at least 14V to charge a 12V battery at full current. You are now 1.8V from charging dropout. Any further temperature rise and the station stops pulling watts.
The fix: always wire two panels in series for portable power station input. Verify your station’s maximum solar Voc in the spec sheet first — the limit is usually 60V for mid-range models. Two 100W panels at 22.5V Voc in series = 45V Voc, safely below 60V on any afternoon.
For a detailed breakdown of which stations handle high-voltage inputs and which throttle below their rated input, see our Portable Power Station Voltage Throttling Guide.
Which Wiring Method for Your System — 60-Second Decision
- 2 panels, 12V system, PWM controller: Parallel
- 2 panels, 24V system, MPPT: Series
- 3 panels, 24V system, MPPT: Series — verify Voc × 3 × 1.25 is below controller limit
- 4 panels, any MPPT system: 2S2P — this is always the answer
- 4 panels, EcoFlow / Jackery / BLUETTI: 2 in series (check station max Voc first)
- 6 panels, 24V MPPT system: 2S3P — 2 panels per string, 3 strings in parallel
- 6 panels, 48V MPPT system: 3S2P — 3 panels per string, 2 strings in parallel
- Shading unavoidable: Parallel or 2S2P — never pure series on a consistently shaded array
Frequently Asked Questions
Should I wire solar panels in series or parallel?
Series for MPPT controllers, 24V/48V battery banks, and cable runs over 15 feet. Parallel for 12V systems and PWM controllers. For 4 or more panels, 2S2P series-parallel is almost always the right answer — it balances voltage and current for maximum MPPT efficiency while keeping wire gauge manageable.
What wire gauge for solar panels in Pakistan’s summer?
Use 10 AWG USE-2 rated cable for all series and 2S2P runs up to 800W. Apply NEC 0.75 derating factor at 50°C ambient — this reduces 10 AWG’s effective capacity from 30A to 22.5A. For rooftop south-facing conduit in July, use 8 AWG. Always use 6 AWG for the controller-to-battery run regardless of system size.
Can one shaded panel kill a series string?
Partially. Modern panels have bypass diodes that reroute current around shaded cells, reducing the penalty. But output still drops significantly more than in parallel. If one panel is regularly shaded between 10am and 2pm, that string loses more than the shaded panel’s individual share. In that case, put the shaded panel on its own parallel string or switch to 2S2P with the shaded panel isolated in one string.
How do I know if my MPPT can handle a series string?
Find your panel’s Voc on the datasheet. Multiply by the number of panels in series. Then multiply by 1.25. That final number must be below your MPPT’s rated maximum PV input voltage — usually printed on the controller label or in the spec sheet as “Max PV Open Circuit Voltage.” If it is over, reduce panels in the series string or use a higher-rated controller.
What is the correct fuse size for a 100W solar panel string?
Per NEC 690.9: fuse = panel Isc × 1.25. A standard 100W panel has Isc of approximately 5.74A. 5.74 × 1.25 = 7.2A — round up to the nearest standard fuse size = 8A. Install one inline fuse per string positive lead, not just one fuse for the combined array homerun.
Can I add a third panel to my existing 2-panel series system?
Yes, if your MPPT can handle the higher Voc. Three 22.5V Voc panels in series: 67.5V × 1.25 = 84.4V. A standard 100V MPPT handles this safely. If you have an 80V or lower MPPT, you cannot add a third panel in series without risking the controller. Instead, add the third panel as a separate parallel string and put a 8A inline fuse on its positive lead.
Final Verdict — GrowLogicHub Recommendation 2026
For any off-grid system in Pakistan — Rawalpindi, Lahore, Karachi, or anywhere the summer runs past 40°C — the correct default setup is: 4 panels in 2S2P, 40A MPPT charge controller, 10 AWG USE-2 wire throughout, 6 AWG controller-to-battery run.
This is not a guess. It is what three years of rooftop installs in Rawalpindi produced as the most reliable, highest-yield, lowest-maintenance configuration. The only variable is your specific panel Voc and your MPPT’s rated input limit. Use the table in Section 5 to confirm before wiring.
After the wiring is right, close the remaining gap: panel soiling. A correctly-wired system that has not been cleaned in 3 weeks in Punjab is still running at 75–80% of rated output. Read our Best Solar Panel Cleaning Tools Guide for the exact tools that recover those watts.
— Waqas Irfan, Off-Grid Field Engineer
Rawalpindi, Punjab, Pakistan | June 2026
Sources & References
- NFPA 70 / NEC Article 690: Solar PV systems — overcurrent protection, wiring methods, fusing requirements. nfpa.org
- NEC Table 310.15(B) — Temperature Derating: Wire ampacity correction factors at 50°C and 60°C ambient. Off Grid Authority Solar Wire Sizing Guide
- Renogy — Series vs Parallel: MPPT voltage/current behaviour in series and parallel configurations. renogy.com
- Aurora Solar / NREL — Soiling Losses: 0.01–0.5% daily output degradation in dusty climates. aurorasolar.com
- Off Grid Authority — Solar Wiring Diagrams: Series, parallel, and 2S2P examples with wire loss calculations. offgridauthority.com
- SunForgeLab — Solar Wire Gauge Chart: NEC derating worked examples at 50°C and 60°C. sunforgelab.com
- VoltPlan — Series vs Parallel Guide: Wire loss percentages and MPPT headroom analysis. voltplan.app
- SolarTechOnline — Bypass Diodes and Shading: How bypass diodes partially compensate for series shading losses. solartechonline.com
Related GrowLogicHub Guides
- MPPT vs PWM Solar Charge Controller Guide — how your controller choice determines which wiring method works
- Solar Connector Compatibility: MC4, XT60 & Anderson (2026) — correct connectors for every wiring configuration
- Best Portable Solar Panels for Camping (2026) — which panels to buy before you wire them
- Portable Power Station Voltage Throttling Guide — why incorrect wiring voltage triggers BMS shutdown
- Best Solar Panel Cleaning Tools (2026) — recover 17–23% output lost to dust after your system is wired
Editorial Standards: GrowLogicHub.com publishes field-tested, independently written guides. All wiring data referenced from NEC 2023, manufacturer datasheets, and field measurements conducted in Rawalpindi, Punjab, Pakistan. Temperature derating values per NEC Table 310.15(B)(16). All affiliate links are clearly marked. Commission earnings never influence technical recommendations. Guide updated June 2026.